Posted on

How do tone capacitors work ?

how do tone capacitors work ? tone capacitors for electric guitars

Tone capacitors play a role in shaping the sound of your guitar. They are a part of the guitar’s tone control circuit, affecting the high frequencies in the guitar’s output, allowing players to adjust the brightness or warmth of their tone. Understanding how tone capacitors work involves grasping basic electronic principles, such as how capacitors interact with resistors and inductors to influence an electrical signal. In this case, the signal is the sound generated by the guitar’s pickups.

The Basics of Tone Capacitors

A capacitor is a two-terminal electrical component that stores and releases electrical energy. It consists of two conductive plates separated by a dielectric material (an insulator). In an electric guitar’s tone circuit, the capacitor is paired with a variable resistor, commonly known as the tone potentiometer (pot), which allows for adjustable resistance. This combination creates a low-pass filter, which affects the frequencies of the signal passing through it.

The principle behind a tone capacitor’s operation is its ability to block low-frequency signals while allowing high-frequency signals to pass through. In the guitar’s circuit, the tone capacitor functions by bleeding high-frequency signals to ground, reducing the treble content of the sound. The tone control knob on the guitar adjusts how much of these high frequencies are bled to ground, allowing the guitarist to make the sound warmer (darker) or brighter (more trebly).

Capacitors and Tone Circuits

In an electric guitar, the pickups produce an alternating current (AC) signal that varies based on the vibration of the strings. This signal is sent to the guitar’s output jack, but along the way, it passes through various components, including volume and tone controls. The tone control consists of a potentiometer connected in series with a capacitor. When the tone knob is at its maximum 10 position, the capacitor is pretty much out of the circuit. All the signal goes to the output without any treble cut. As you turn the tone knob down, more high-frequency signal is sent to ground through the capacitor.

The capacitor’s value determines the range of frequencies affected by the tone control. Capacitors are rated in farads, though in guitar circuits, the values are typically in microfarads (µF) or picofarads (pF). Common values for guitar tone capacitors are 0.022 µF, 0.047 µF, and 0.1 µF. Smaller capacitance values like 0.022 µF bleed fewer high frequencies to ground, resulting in a brighter tone, while larger values like 0.047 µF cut more treble, giving a warmer sound.

Interaction with the Pickup and Potentiometer

Pickups are inductive devices that convert the string’s vibrations into an electrical signal. This signal contains a range of frequencies, including both low and high frequencies. The tone circuit, specifically the capacitor, interacts with the signal from the pickups and the resistance of the tone pot to filter out specific frequencies.

The tone pot is essentially a variable resistor. When the pot is fully open (knob turned all the way up), there’s little resistance between the signal and the output jack, so most frequencies, including treble, pass through. As the pot is turned down, resistance increases, and the capacitor begins to bleed higher frequencies to ground. The pot’s resistance and the capacitor’s capacitance together define the frequency at which this roll-off begins. This frequency is called the cut off frequency, and it determines how much treble is removed from the signal.

The higher the value of the potentiometer (e.g., 500kΩ vs. 250kΩ), the less treble will be bled off, which means that a 500kΩ pot allows for a brighter sound compared to a 250kΩ pot when used with the same capacitor.

Differing value capacitors can also be used in treble bleed kits, such as the one we sell here

Different Capacitor Types and Their Impact

a mylar tone capacitor that has been cut in half.
A mylar capacitor chopped in half shtomgh the quite unmagiical insides.

Guitarists often debate the tonal differences between different types of capacitors, such as ceramic, polyester (Mylar), and paper-in-oil capacitors. While the capacitance value is the primary factor determining the capacitor’s function, some claim that different materials give subtle tonal characteristics. For example, paper-in-oil capacitors are often described as having a smoother, more vintage sound, while ceramic capacitors are sometimes characterized as sounding harsher or less refined. However, the differences in sound between capacitor types are subtle, and many players find them negligible in real-world performance, attributing more tonal variation to capacitance value than to the material.

For the benefit of science the above picture shows a Mylar cap that I’ve chopped in half. You can just about see the different layers of insulator and conductive film that are inside

Practical Use and Tone Shaping

In practice, the tone capacitor is a tool for guitarists to fine-tune their sound. Players can roll back the tone knob to darken the sound when playing rhythm or solos that need to blend into the mix. Cranking the tone knob back up brightens the sound for lead breaks and solos. The tone capacitor’s interaction with the guitar’s pickups also allows for a wide variety of tonal expressions, particularly when paired with different types of pickups like single coils or humbuckers, which have distinct frequency responses.

For instance, a 0.047 µF capacitor and a B250k pot are often paired with single-coil pickups, which are naturally brighter, to provide a smoother, warmer tone when needed. On the other hand, a 0.022 µF capacitor in combination with a B500k pot are commonly used with humbuckers, which are thicker-sounding, to preserve more high frequencies and maintain clarity.

And finally…………………..

Tone capacitors are a small but interesting part of an electric guitar’s electronics, providing players with the ability to adjust the high-frequency content of their signal. Working with the tone pot, the capacitor allows players to achieve a wide range of tonal colors, from bright and cutting to warm and mellow.

While capacitor type and material may have a minimal impact on the overall sound, the capacitance value and its relationship with the guitar’s pickups and potentiometers can have a noticeable effect on the overall tone.

Why not play around with some different values and see what tones sound best to your individual ear.

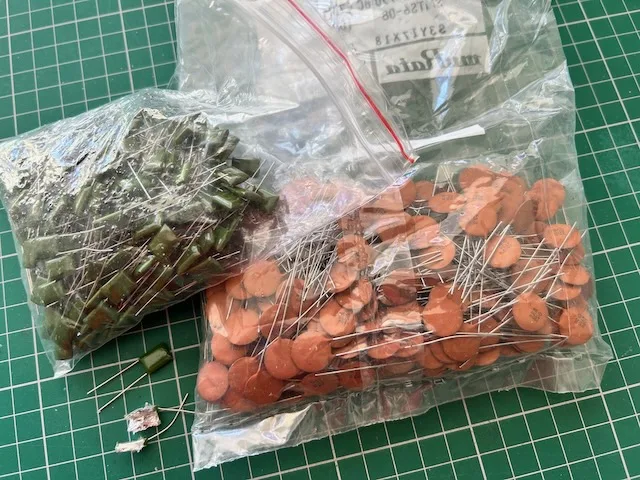
And finally a bit more – it really isn’t worth paying out big money for vintage or posh tone caps and they really aren’t that different from the cheapest of them out there. And when its buried inside your guitar no one can see the bright orange, or the bumble bee colours or that fact it’s the size of a small beer barrel.

Here’s a gold plated one I made earlier. £1M and its yours

This article was written by Josi Warman, founder of Warman Guitars. With over 40 years of experience building guitars, designing pickups, creating custom wiring systems and publishing guitar-building guides, Josi has helped thousands of players upgrade and customise their instruments.

Posted on

Beginners guide to changing guitar pickups

Changing the pickups in a guitar can be a rewarding DIY project. Especially if you’re looking to improve the tone or customize the sound of your instrument. Here’s a general Newbies 11 step guide to help you change your guitar pickups:

Just for the hell of it the image is AI generated as it’s so wonderfully weird and unlike anything I have ever seen on the bench :-). Looks like my first attempt when I was a lad.

AI generated image of guitar wiring

Tools & Materials Needed:

  1. New pickups (you’re going to choose from the Warman range , right ! )
  2. Screwdrivers (usually a Phillips head)
  3. Soldering iron and solder
  4. Wire cutters/strippers
  5. Multimeter (optional, for checking connections and can be picked up at low cost online)
  6. Desoldering pump or braid not essential but handy (for removing old solder)
  7. Tape or ties (for cable management)
  8. Guitar strings (you need to remove the existing ones and probably replace them)

Steps to swapping Pickups:

1. Choose the Right Pickups

  • Single Coil vs. Humbucker: Make sure the new pickups fit your guitar’s pickup slots. Single coils and humbuckers have different sizes, and the tone difference is substantial.
  • Consider Wiring Type: Some pickups have 2-wire or 4-wire configurations, and some feature active electronics (which may require a battery).

2. Remove the Guitar Strings

  • Loosen or completely remove the strings to allow easy access to the pickups.

3. Remove the Pickguard or Back Plate

  • For Strat-style guitars, you’ll typically remove the pickguard by unscrewing it.
  • For Les Paul-style guitars, the back plate covering the electronics needs to be removed.
  • Ensure you don’t lose any screws. Pop them into a box or tub with a lid on it to keep them safe.

4. Take Note of Existing Wiring

  • Before disconnecting anything, take pictures or note the wiring layout. This will make it easier to reconnect everything properly.
  • Identify the pickup wiring connected to the volume pots, tone pots, and the switch.
  • Label them , phot graph them, sketch them – just make sure you can reference what went where. Saves you massive headaches later on.

5. Desolder the Old Pickups

  • Heat the connections where the pickup wires are soldered to the pots. Then gently pull the wires away as the solder melts.
  • Use a desoldering pump or braid to remove old solder if you have one.

6. Install the New Pickups

  • Position the new pickups in the pickup cavities. If you’re swapping between single-coils and humbuckers, make sure they fit snugly. If not, you will need to change the pickup rings or pickguard.
  • Run the new wires through to the electronics cavity (or under the pickguard if it’s a Strat-type).

7. Solder the New Wires

  • Follow the wiring diagram that came with the pickups or the notes you took. Ours are
    • Humbucker Ground wire (usually braided wire) goes to the back of a potentiometer (pot).
    • Humbucker black wire goes rot the back of a pot
    • Red and white are the wires that link the two coils together. Just leave them connected.
    • Humbucker green wire is the hot and connects to either the volume pot or the selector switch.
  • Make sure your solder joints are clean and solid.
  • Single coils generally have a b lack ground wire and a coloured or white hot lead.

8. Test Connections

  • Use a multimeter to ensure continuity in the connections (optional but helpful).
  • Before fully reassembling, plug in the guitar and lightly tap the pickups with a screwdriver to ensure they’re functioning. If all is OK you should hear a clunk as you tap the screw driver onto the poles.

9. Reassemble the Guitar

  • Put the pickguard or back plate back on and screw it in.
  • Restring the guitar and tune it to pitch.

10. Adjust Pickup Height

  • You can raise or lower the pickups by adjusting the screws on the pickup mounts. The closer the pickups are to the strings, the hotter (louder) the output. Be careful not to put them too close or it can cause magnetic pull on the strings. This can lead to intonation issues. Your ears will tell you where your personal sweet spot is.

11. Final Testing

  • Plug the guitar into an amp and test each pickup position.
  • Check for any buzzing or faulty wiring and adjust pickup height for your desired tone.

Tips for Pickup Swapping:

  • Wiring Diagrams: If you’re unsure about wiring, look up the manufacturer’s wiring diagram (most brands have diagrams available online).
  • Shielding: If you’re getting a lot of hum, you might consider shielding the guitar’s electronics cavity. Use conductive paint or copper tape for better grounding. Also check the ground wire from the back of the pot to the guitars bridge is properly connected.
  • Try Different Combinations: Experiment with pickup combinations to get the best tone. You can mix single-coils and humbuckers, or use coil-splitting to get versatile tones.

That’s it , that’s our changing guitar pickups. This guide gives you the basic Rookie steps. Specifics vary depending on your guitar model and the pickups you’re installing. Feel free to ask if you need further clarification!

This article was written by Josi Warman, founder of Warman Guitars. With over 40 years of experience building guitars, designing pickups, creating custom wiring systems and publishing guitar-building guides, Josi has helped thousands of players upgrade and customise their instruments.

Posted on

Rare Earth Magnet Pickups

Rare earth magnets are not commonly found in guitar pickups.

Why Rare Earth Magnets Are Not Commonly Used in Guitar Pickups

Guitar pickups, whether humucker or single coil, are a critical component in the design and functionality of electric guitars, converting string vibrations into electrical signals, which are then amplified. Most guitar pickups use magnets made from materials like Alnico (an alloy of aluminum, nickel, and cobalt) or ceramic. However, rare earth magnets, such as neodymium and samarium-cobalt, are not commonly found in guitar pickups. While rare earth magnets offer unique advantages, several factors contribute to their limited use in this particular application.

1. Excessive Strength of Rare Earth Magnets

One of the most defining features of rare earth magnets is their exceptional strength. Neodymium magnets, for instance, are among the strongest commercially available magnets, significantly more powerful than Alnico or ceramic magnets. While strength may seem beneficial, it can actually create problems in the context of guitar pickups.

The primary issue is the impact on string vibrations. Magnets in pickups exert a magnetic pull on the guitar strings, affecting their natural vibration. Stronger magnets can cause a phenomenon known as “string pull,” where the magnetic field interferes with the free movement of the strings. This interference can lead to unwanted tonal problems, such as intonation issues, reduced sustain, and strange overtones. Guitarists generally value a natural, smooth sound, and rare earth magnets can overpower the strings to the point where the sound becomes unnatural or too aggressive.

While some players may prefer a punchier or more defined tone that stronger magnets could theoretically provide, most guitarists prefer the more traditional, balanced tone of Alnico or ceramic magnets.

2. Unwanted Brightness and Harshness

In terms of tonal characteristics, rare earth magnets tend to produce a very bright, harsh sound that is often less desirable to guitarists. Traditional pickups made with Alnico or ceramic magnets are known for their warmth, smooth midrange, and roundness, which contribute to the classic tones associated with vintage and modern electric guitars. These magnets provide a balanced and musical tone with rich harmonics and pleasing overtones.

Rare earth magnets, on the other hand, can make the tone excessively bright, with more high-frequency content than most players find useful. This can result in a brittle or “ice-pick” sound, which is generally considered unpleasant in the context of guitar performance. While EQ adjustments or tone controls can help tame this excessive brightness, most guitarists prefer a pickup that naturally complements their playing style and musical genre without requiring additional electronic adjustments.

3. Lack of Customary Vintage Appeal

Another reason why rare earth magnets are not commonly used in guitar pickups is the lack of vintage appeal. Much of the electric guitar market is driven by tradition and nostalgia, with many players seeking to replicate the classic sounds of famous guitarists from the 1950s, 60s, and 70s. Alnico magnets, particularly Alnico 2 and Alnico 5, have been used in pickups for decades and are associated with the “holy grail” tones of iconic instruments, like the Fender Stratocaster and Gibson Les Paul.

Rare earth magnets, by contrast, do not have the same historical or emotional resonance with guitarists. Many players are hesitant to adopt new technologies or materials that do not align with the vintage aesthetic or tonal character they are seeking. As a result, rare earth magnets, despite their superior strength and modern appeal, have not gained widespread acceptance in the guitar community.

4. Cost and Availability

While rare earth magnets are relatively affordable and accessible in some industries, they can still be more expensive than Alnico or ceramic magnets. Neodymium, in particular, is subject to price fluctuations due to the geopolitics of rare earth mining. Most rare earth elements are mined in specific regions, like China, which can create supply chain uncertainties.

For guitar manufacturers, using rare earth magnets could drive up production costs, and this cost increase would be passed on to consumers. Many guitarists are unwilling to pay a premium for pickups made with rare earth magnets, especially when more affordable and time-tested options, like Alnico and ceramic magnets, are available and deliver the desired sound. For guitar makers, there is little incentive to use more expensive materials if they do not significantly improve or enhance the tonal qualities that guitarists are looking for.

5. Suitability for Other Applications

Rare earth magnets are more commonly used in applications where their strength is an advantage, such as in motors, hard drives, and advanced electronics. These industries prioritize the magnet’s ability to generate a strong magnetic field in a small space. In the world of guitar pickups, however, the strongest magnetic field is not necessarily desirable. Guitar pickups require a balance between magnetic strength and the ability to allow the strings to vibrate naturally, without interference.

Guitar pickups are also designed to capture nuances in the player’s performance, including subtle variations in dynamics and tone. Rare earth magnets may be too powerful to allow these subtleties to shine through, reducing the expressiveness of the instrument.

Conclusion

While rare earth magnets have revolutionized other industries, their use in guitar pickups is limited for several reasons. Their excessive strength can lead to issues with string pull and tone, while their inherent brightness can result in an unpleasant, overly harsh sound. Additionally, the lack of vintage appeal and potential cost issues make them less attractive to both guitarists and manufacturers. In contrast, traditional Alnico and ceramic magnets have stood the test of time, offering a balanced tone, affordability, and a proven track record in the world of electric guitars. For these reasons, rare earth magnets are likely to remain a niche option, with Alnico and ceramic magnets continuing to dominate the guitar pickup market.

This article was written by Josi Warman, founder of Warman Guitars. With over 40 years of experience building guitars, designing pickups, creating custom wiring systems and publishing guitar-building guides, Josi has helped thousands of players upgrade and customise their instruments.

Posted on

How guitar pickups work. 

Warman Blues Babies. Alnico 5 vintage tone chrome humbucking guitar pickups

How do guitar pickup works. 

Or more formally entitledThe Anatomy and Function of Electric Guitar Pickups. 

Or The is not Magic, its just a bit of basic science.

Electric guitar pickups are the heart and soul of your instrument’s sound. Responsible for capturing the vibrations of the strings and converting them into electrical signals that can be amplified and modified. Understanding the design, components, and workings of pickups is useful for any guitarist, luthier, or music enthusiast looking to explore the intricacies of electric guitar tone. In this bit of blurb, we will look into how electric guitar pickups are designed, their key components, and the basic ( not rocket )science behind how they produce sound.

Warman Texas Triple Hots, single coil pickups
How guitar pickups work. Warman Texas Triple Hots

1. What is an Electric Guitar Pickup?

At its core, an electric guitar pickup is a type of transducer—a device that converts one form of energy into another. Pickups convert the mechanical energy of vibrating guitar strings into electrical energy. This energy can then be amplified and manipulated. This conversion process is the foundation of how electric guitars produce sound.Pickups are critical in defining the guitar’s tone, character, and sonic capabilities.

2. Key Components of Electric Guitar Pickups

Understanding how electric guitar pickups work requires a quick look at their main components:

a. Magnets

Magnets are the central element of any pickup, creating the magnetic field necessary for inducing electric current. The most common types of magnets used in pickups are Alnico (an alloy of aluminum, nickel, and cobalt) and ceramic. Alnico magnets, especially Alnico II and Alnico V, are known for their warm, vintage tone and have been a staple in pickups since the early days of electric guitars. Ceramic magnets, on the other hand, are typically stronger and are known for producing brighter, more aggressive tones.

b. Coils of Wire

A pickup coil consists of thousands of turns of thin copper wire wrapped around a bobbin or a central core. The number of windings and the gauge of the wire can significantly affect the pickup’s tonal characteristics. More windings increase the output and enhance the midrange frequencies, leading to a thicker sound. The wire used is insulated with a coating to prevent short circuits and keep the integrity of the signal.

c. Pole Pieces

Humbucker pole pieces can be cylindrical metal rods, or screws or solid bars positioned underneath each string. They focus and direct the magnetic field created by the magnets. The height and material of these pole pieces can, dependant on the pickup design, be adjusted to balance the output of each string, catering to the tonal preferences of the player.

In single-coil pickups, each pole piece is either  a solid magnet rod or a steel rod that connects to a bar magnet on the pickups base. These usually aligns directly under a string, ensuring each string has a strong magnetic field around it. Its not uncommon though for solid steel bars to be used ointment place of individual magnet poles.

d. Base Plate and Cover

The base plate, typically made from metal, acts as support for the pickup components. Some pickups also have a metal cover for aesthetic purposes and to protect the internal components. Covers can subtly affect the pickup’s tone, often slightly softening high frequencies. Some pickup designs use covers to control noise and shield the pickup from electromagnetic interference.

e. Wiring and Output Leads

Wiring is pretty important for transmitting the electrical signal generated by the pickup to the guitar’s electronics (volume and tone controls) and eventually to the output jack. Output leads are typically shielded to prevent unwanted noise and interference from external sources, ensuring the cleanest possible signal.

3. Types of Electric Guitar Pickups

There are two main types of electric guitar pickups, each with distinct characteristics:

a. Single-Coil Pickups

Single-coil guitar pickups are the original and most straightforward pickup design, featuring a single coil of wire wrapped around a magnet or set of magnets. They are known for their bright, clear, and crisp tone, with a high level of sensitivity to string dynamics. This sensitivity allows single-coil pickups to capture a wide range of nuances in a player’s technique.They are also prone to electromagnetic interference, which can result in a 60-cycle hum or buzz, especially in high-gain settings.

b. Humbucker Pickups

Developed to sort out the noise issue common with single-coils, humbuckers use two coils wound in opposite directions and with reversed magnetic polarity. This design cancels out much of the electromagnetic interference, reducing hum and noise, hence the name “humbucker.” The tone produced by humbuckers is typically thicker, warmer, and has more output than single-coils. This makes them popular in rock, metal, and jazz genres where a fuller sound and higher gain are desired.

4. How Pickups Produce Sound

The process by which electric guitar pickups produce sound is based on electromagnetic induction, a fundamental principle of physics discovered by Michael Faraday in the 19th century. Here’s how it works in the context of guitar pickups:

  1. String Vibration: When a guitarist plucks or strums a string, it vibrates. The vibration of the metal string disrupts the stable magnetic field generated by the pickup’s magnet.
  2. Magnetic Field Disturbance: As the metal string moves through the magnetic field, it induces a variation in the magnetic flux around the coil of wire. This flux change is a form of energy transfer from the string to the coil.
  3. Electromotive Force (EMF): The variation in magnetic flux induces an electromotive force (EMF) in the coil according to Faraday’s law of electromagnetic induction. This induced EMF causes an electric current to flow in the coil, generating an alternating current (AC) that mirrors the string’s vibration.
  4. Signal Transmission: The AC signal generated by the coil is a weak electrical current that travels through the guitar’s internal wiring to the output jack. This signal is then sent to an amplifier, where it is boosted and converted back into sound by a speaker.
  5. Sound Production: The amplifier reproduces the sound characteristics of the vibrating strings. The tone, sustain, and other qualities are shaped by the pickup’s construction, including magnet type, coil winding, and other factors. Adjusting volume and tone controls on the guitar modifies the signal’s characteristics before amplification, allowing for further tonal shaping.

5. Factors Influencing Pickup Sound – again its not magic

Lots of factors influence the sound produced by a pickup. Some of the most significant include:

  • Magnet Type and Strength: Alnico and ceramic magnets impart different tonal qualities. Stronger magnets tend to produce higher output and more focused sound, while weaker magnets result in softer, vintage-like tones.
  • Coil Winding: The number of wire windings affects the pickup’s output level and tonal balance. More windings increase output and midrange frequencies, resulting in a fuller sound, while fewer windings can offer a clearer, brighter tone.
  • Pole Piece Material and Configuration: Different materials and configurations of pole pieces can alter the magnetic field and the pickup’s tonal characteristics. Adjustable pole pieces allow players to fine-tune the balance of individual string outputs.
  • Pickup Position: The location of the pickup on the guitar body (near the bridge, middle, or neck) significantly affects the sound. Bridge pickups capture sharper, brighter tones with higher frequency content, while neck pickups produce warmer, deeper tones due to their position near the string’s vibrating midpoint where oscillations are greatest.

6. So that’s how guitar pickups work

Electric guitar pickups are basic engineering, relying on fundamental principles of magnetism and electronics to capture and amplify the sounds of vibrating strings. Their design, components, and construction directly influence the character and quality of the sound produced. 

Whether a guitarist seeks the bright clarity of a single-coil, the warm, full-bodied tone of a humbucker, or the modern versatility of active pickups, understanding the role of pickups is key to shaping the perfect tone. 

As technology continues to advance, the evolution of pickup design will undoubtedly offer new sonic possibilities, inspiring musicians to explore and create ever more diverse soundscapes.

This article was written by Josi Warman, founder of Warman Guitars. With over 40 years of experience building guitars, designing pickups, creating custom wiring systems and publishing guitar-building guides, Josi has helped thousands of players upgrade and customise their instruments.